

Before I start I want to give you the warning that a lot of cooks fail to do when they’re writing about sourdough and that is that it takes a relatively long time to get to that final loaf of bread. There are much much quicker methods for bread baking and if I’m entirely honest, whilst the payoff is certainly wonderful, I’m not entirely sure it’s worth dedicating so much of your life to. Well, perhaps I’d have said this if the world weren’t in lockdown and we didn’t have all the time in the world right now but it’s definitely a bread you need to dedicate a day to. It is however a great bread to bake whilst in lockdown because if you can’t get hold of yeast, you’re creating your own and so don’t need any. Yeast is naturally all around us in the air and we rely on this to create the sourdough which also gives it the unique sour taste that we love so much.
I’ll try and not get too technical about it because I find this all rather off-putting but the basic timeline is; 7 days to make a starter, 1 further day to prepare and rise the dough with followed by an overnight rest in the fridge before you can bake. However, once you’ve got your starter on the go you can then plan to have a sourdough loaf every Saturday morning with a little pre-prep the day before.
So I’ll try and keep this as simple as possible, here goes (and of course, feel free to ask me any questions in the comments below or via instagram @DominicLouisFranks where you can see a full tutorial in my highlights.)

Before we start…
I wanted to share that I have been inspired by the very brilliant Edd Kimber, better known as The Boy Who Bakes who has an incredible blog and the most genius, easy to follow recipe and method for making sourdough. I’ve been using this technique and adapting it slightly to fit my needs but if at any point you need his wonderful calming notes then I urge you to check out his sourdough videos.
Step 1 – The Starter
The starter is your best friend and, if treated well and fed properly, she will last forever. I keep mine in my fridge and at one point had a starter for 5 years! You will use a little bit of the starter each time you make a loaf. It takes 7 days to make a starter but it’s really simple.
You will need something like a jam jar with one of those screw-lids that can let a little air into the jar, or I use a kilner jar with a hinged lid. To be honest a plastic cup with a bit of clingfilm on it will work. You will also need a rubber spatula because you should avoid using metal in your starter. (Don’t ask me why, it’s a chemical thing.)
You will also need a mix of flours. I use 50% strong white bread flour and 50% rye flour but any flour will work (wholemeal is particularly good) but you don’t need a mix, you can just use plain white flour. A 7 day starter will use up to 450g of flour to make, so I mix up 500g of flour in a tuppaware box for the duration.
Also, very important to remember that everyone’s starters will act differently, depending on flour, room temperature, water etc. Yours may react quicker or take an extra day to ferment. There are no wrongs here.
For the first few days you want to feed your starter at the same time each day, so pick a time suitable to you. I started mine at 9am.
- 50g flour mix
- 50ml (or 50g) water at room temperature
Day 1 – 9am: Mix the flour and water well together in your jar so there are no dry bits of flour left, place the lid on loosely so some air can get in and set aside in a cupboard or shelf that has a regular room temperature, away from direct sunlight or cold, for 24 hours. Mark the side of the jar with some tape or a pen so you can check progress.
Day 2 – 9am: add 50g flour and 50g water to the starter and mix well in
Day 3 – 9am: you should start to see some small bubbles forming on top and a light fermented smell. Now is the time to ‘discard and feed.’ So you want to remove roughly 80% of the starter in the jar and chuck it away (you can compost it or throw it in the bin but I’d avoid pouring down the sink unless you dilute it well first as it will dry in a clump and you’ll be cursing me!) and then add 50g flour and 50ml water and stir in
Day 4 – 9am: discard 80% and add 50g flour, 50ml water and stir in well
Day 5 – 9am: discard 80% and add 50g flour, 50ml water and stir in well
Day 5 – 9pm: check progress, if the starter has doubled in size then you can start feeding it every 12 hours instead of every 24 hours (don’t worry if yours hasn’t grown, it could be another day before you start the double feed)
Day 6 – 9am: discard 80% and add 50g flour, 50ml water and stir in well
Day 6 – 9pm: discard 80% and add 50g flour, 50ml water and stir in well
Day 7 – 9am: discard 80% and add 50g flour, 50ml water and stir in well
Day 7 – 9pm: discard 80% and add 50g flour, 50ml water and stir in well

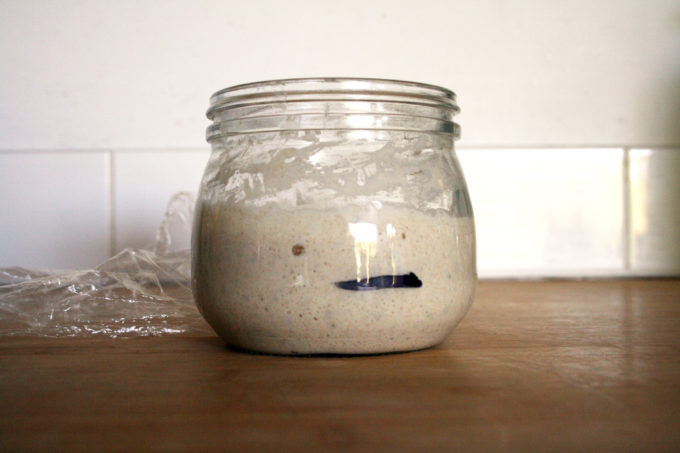
the starter – day 7
Step 2 – preparing the dough
- 100g levain (see below)
- 500g flour (I like to use 400g white bread flour and 100g rye flour but any combo with work)
- 375ml water
- 1 teaspoon salt
You will also need a plastic and a metal dough scraper although this isn’t essential – I actually use a rubber spatula and a large metal meat cleaver which have been fine and the more confident I get the better the results.
The next step takes 24 hours from preparing the dough to the final bake, so if you want your sourdough on a Saturday morning for instance then you need to start preparing the dough on Friday morning.
First thing in the morning you need to make a levain, which is essentially making a starter from your starter. Take roughly 25g of your starter (a large spoonful) and add it to a clean jar, then add 50g of flour mix and 50ml tepid water and mix well. Place this in an airing cupboard or somewhere with a relatively warm ambient temperature for roughly 5 hours. It needs to double in size, so mark the jar.
At this point you can also feed your original starter and then put it in the fridge (again with the lid not fully closed.) You only need to feed it again when you need to use it, more of which I will explain later.
the levain – doubled in size
After about 3 hours, or when your levain has risen 3/4 you need to make an autolyse. Don’t panic about the fancy words, this is just French for a plain dough which is a mix of flour and water, that has rested for at least an hour before add the starter. Place the 500g of flour mix in a large bowl and pour in 350ml of the water (retain the last 25ml for later) and mix together well until fully combined and no dry flour is left. I use a rubber spatula but to be honest your hands are the best tool for this job, it’s just very messy. Cover with clingfilm (or a shower cap is very handy here) and set aside for an hour or for the rest of the time that the levain has to double in size.

adding the levain to the autolyse
The next step is to add the levain to the autolyse. This is a case of spooning 100g of the levain onto the autolyse and squooshing it in. Again, your fingertips are good for this. Once fully combined, cover and set aside for 15 minutes.
The next step is to add the salt and the remaining 25ml of water to the dough. You CANNOT skip this step. Salt is essential. Again, squoosh it into the dough. It will be a horrid mess at first because the water won’t want to be absorbed but give it time and it will become a shaggy mess. Again, your hands are the best tools for this. Cover and set aside for 30 minutes.

the first stretch and fold in the bowl
Stretch & Fold x 4
The next step in the dough preparation is called the ‘stretch and fold’ and it’s exactly that. You want to think of the dough in its bowl as a clock with the 12, 3, 6 and 9 numbers of a clock face. (Or North, South, East and West if you prefer…) So with the dough still in the bowl, you want to grab the 12 o’clock side of the dough and stretch it upwards and then fold it over the dough. The turn the bowl by 45degrees and grab 3 o’clock side and pull and fold, then the 6 o’clock and then the 9 o’clock. This is best achieved with a wet hand, so have a small bowl of water handy. it’s very simple and doesn’t take long but you need to do this 4 times, with 30 minutes rest between each ‘stretch and fold.’
After the last stretch and fold, cover the bowl with clingfilm and set aside somewhere with an ambient temperature for 2 hours or until the dough has doubled in size and there are bubbles forming on the surface. If you give the bowl a little jiggle the dough should wobble like a semi-set jelly.

forming a rough circle of dough – like a dim sum dumpling!
Shaping
You’re now ready to shape your dough and quite frankly this is the tricky bit because your dough is still relatively sticky and so you have to move fast. To be honest there’s not much that can go wrong, it’s just about being confident and swift and calm all at the same time.
Flour your work surface and use a plastic dough scraper or a rubber spatula) to gently scrape the dough from the bowl. Flour your hands and then (again, thinking of the dough like a clock) go underneath the dough and fold it over itself, turning the dough as you go. You’re forming a rough circle and you should be able to create some tension in the ball. It will look somewhat like a giant dim sum dumpling! Once you’ve gone all the way around, flip the dough over (you may need your spatula for this) cover with a tea towel and leave to relax for 20 minutes.

pull up from the 12 o’clock point and fold over
Before you start the final shaping you need to prepare your proving bowl. I’m using a traditional banneton basket which you can pick up from the amazing people at Shipton Mill. But a regular bowl would work fine, simply line it with a clean tea towel which you need to dust with flour. I try and use a different flour to the one in the bread as it helps release the dough.
For the final shaping, lightly dust the top of the dough with flour and then swiftly turn the dough over. You may need to use a scraper here but if you move fast, you wont have to.
Again, thinking of the dough as a clock face, lightly lift and stretch the 12 o’clock point of dough up and over towards the 6 o’clock point. Then fold from 3 o’clock to 9 o’clock, then from 6 o’clock up to 12 o’clock. Turn as you go and you should start to feel the tension building in the dough so you have a firmer ball of dough. Turn the dough over so the messy folds are on the worksurface and start tucking the dough under itself, using both hands going under the dough from back to front, turning and repeating till an even tight dough forms. Carefully lift the ball into the proofing bowl., smooth surface down. Place the bowl into the fridge overnight. A minimum of 8 hours in the fridge overnight will give the bread that classic sourdough taste.

Baking
So our journey is nearly at an end and the final glory is almost upon us!
Firstly we need to discuss the baking vessel. I am using my 30cm cast iron deep oval casserole dish with a lid. You can buy special cast iron sourdough baking cloches but they’re not cheap and a casserole dish will work very well. You can just use a baking tray if you don’t have any cast iron. You’ll still get amazing results.
In the morning turn your oven on to it’s highest temperature. My oven goes up to 240C. Place your cooking pot or baking tray into the oven. You need it to get as hot as possible so a minimum of 45 mins before you bake.
Take your sourdough, in its bowl, out of the fridge and cut a large piece of baking paper that fits easily over the bowl but that also entirely covers your cast iron casserole pan. (The pan is going to be scorching hot when it comes out of the oven so you need to use the excess paper to lower the dough into it.) Lay the paper over the sourdough in its bowl, place your hand on top and flip the bowl over and place down onto your counter top.
Dust the top of the dough with a little more flour and then, using a very sharp knife, score a line across the top of the dough. There are numerous patterns and methods for scoring lines in sourdough and I’ll leave you to go off and research these yourself but it is best to cut at least one line across the top. A cross is also a mice idea as this will open the dough up as it cooks.
Very carefully remove the hot pan from the oven, (place it on a trivet) remove the lid and very carefully lower the dough into the pan using the excess baking paper. Place the lid back on and pop the pan back into the oven. You want to bake it for 25 minutes with the lid on and then turn the heat down to 220C and bake for a further 25 minutes.
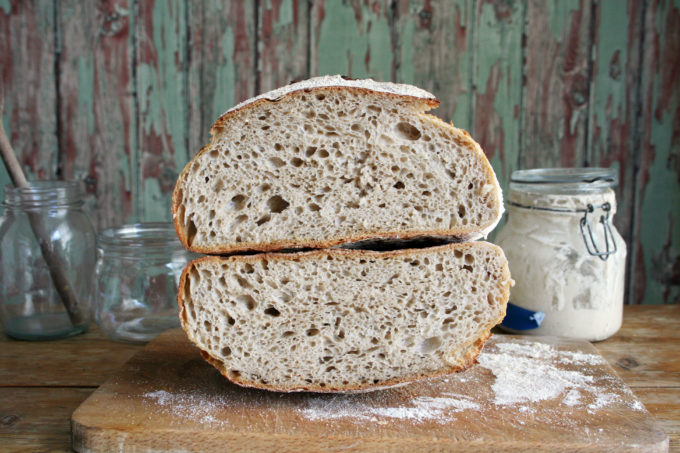
Once baked, remove from the oven and the pan and place on a wire rack for at least an hour before cutting. This hour of rest is essential as it will be very difficult to cut prior to this.
And there you have it. Your first sourdough loaf. I did warn you it would be a slow process but boy is it worth it!


